


Thứ Hai, 26 tháng 9, 2016
Site-to-site IPsec VPN with two FortiGates
Site-to-site IPsec VPN with two FortiGates 5.4.x

3
users rated this
In
this example, you will allow transparent communication between two networks
that are located behind different FortiGates at different offices using
route-based IPsecVPN. The VPN will be created on both
FortiGates by using the VPN Wizard’s Site to Site –
FortiGate template.
In
this example, one office will be referred to as HQ and the other will be
referred to as Branch.
|
1. Configuring the HQ
IPsec VPN
|
|
|
On the HQ
FortiGate, go to VPN > IPsec
Wizard.
Select the Site
to Site template, and selectFortiGate.
|
 |
|
In the Authenticationstep, set IP Address to the IP of the
Branch FortiGate (in the example,172.20.120.135). After you enter
the gateway, an
available interface will be assigned as the Outgoing Interface. If you wish to
use a different interface, select it from the drop-down menu.
|
 |
|
In the Policy &
Routing step,
set the Local Interface. TheLocal Subnets will be added
automatically. SetRemote Subnets to the Branch
FortiGate’s localsubnet (in the
example, 5.5.5.5/24).
|
 |
|
A summary page
shows the configuration created by the wizard, including firewall addresses,
firewall address groups, astatic route, and
security policies.
|
 |
|
2. Configuring the
Branch IPsec VPN
|
|
|
On the Branch
FortiGate, go to VPN > IPsec
Wizard.
Select the Site
to Site template, and selectFortiGate.
|
 |
|
In the Authenticationstep, set IP
Address to
the IP of the HQ FortiGate (in the example, 172.20.121.92). After you enter
the gateway, an available interface will be assigned as the Outgoing Interface. If you wish to
use a different interface, select Change.
Set the same Pre-shared Key that was used for
HQ’s VPN.
|
 |
|
In the Policy &
Routing step,
set the Local Interface. TheLocal Subnets will be added
automatically. SetRemote Subnets to the HQ
FortiGate’s local subnet (in the example, 10.10.10.1/24).
|
 |
|
A summary page
shows the configuration created by the wizard, including firewall addresses,
firewall address groups, a static route, and security policies.
|
 |
|
3. Results
|
|
|
On either
FortiGate, go toMonitor > IPsec Monitorto verify the
status of the VPN tunnel. Right-click under Status and selectBring Up.
|
 |
|
A user on either of
the office networks should be able to connect to any address on the other
office network transparently.
If you need to
generate traffic to test the connection, ping the Branch
FortiGate’sinternal interface from the HQ’s
internal network.
http://cookbook.fortinet.com/
|
|
Thứ Ba, 6 tháng 9, 2016
Giám sát website hoạt động với Google Docs
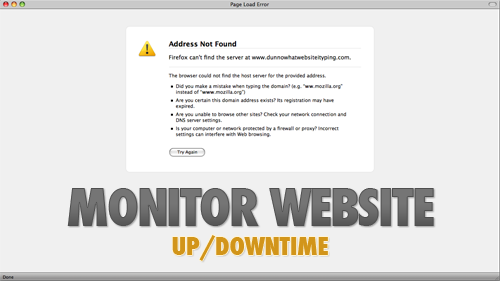
Nếu bạn có một website hoặc blog? Bạn muốn biết khi web của bạn bị chết ( không truy cập được ) có thông báo cho bạn? Hoặc bạn muốn muốn nhận một email hoặc một tin nhắn khi web bạn không thể truy cập được? Bài viết này sẽ giúp bạn điều đó – một công cụ monitor ( giám sát ) miễn phí được phát triển bởi Digital Inspiration trên Google Spreadsheet ( Google Docs ) mà chúng ta vẫn thường sử dụng.

Monitor website để biết được khi web bị chết
Cũng như Subiz – Phần mềm chat hỗ trợ khách hàng – website bạn cũng phải có sự sẵn sàng – Available – để đón nhận khách hàng tới. Đây là công cụ tuyệt vời giúp bạn giám sát được việc này. Hãy bắt đầu thiết lập nó theo các bước sau:
Bước 1: Login tài khoản Google của bạn, click vào đây để copy bản Google sheet vào Google Drive của bạn.
Bước 2: Mở Google Sheet bạn vừa copy, nhập url của web bạn vào vị trí B2 ; nhập email để nhận cảnh báo tại vị trí B3 trên Google Sheet này. Tại vị trí B5, bạn điền Yes nếu muốn nhận tin nhắn SMS. ( sẽ nói thêm ở cuối bài ).
Bước 3: Di chuyển lên Menu, chọn tab “Website Monitor” click “Bước 1: Khởi tạo”. Một Pop-up sẽ bật lên để hỏi Quyền cho chương trình tự động chạy. Bạn hãy Accept để khỏi động chương trình

Bước 4: Quay lại menu Website Monitor và click vào “Bước 2: Bắt đầu chạy” để bắt đầu chạy chương trình. Bạn đã thiết lập xong và có thể đóng lại cửa sổ Google Sheet này.
Chương trình sẽ tự động chạy 5 phút một lần để gọi đến đường dẫn website của bạn. Nếu website của bạn có phản hồi với mã 200 – chứng tỏ web bạn đang hoạt động tốt.
Ngược lại, nếu mã là trên 200 – chứng tỏ có một vấn đề với web của bạn và hệ thống sẽ cảnh báo cho bạn qua email hoặc tin nhắn SMS ( nếu bạn bật ).
Khi phát hiện web đã chết, hệ thống sẽ không cảnh bảo nữa nếu vẫn thấy tình trạng chưa thay đổi. Nó chỉ báo khi thấy web hoạt động bình thường.
Đối với SMS, chương trình cảnh báo bằng cách tạo một sự kiện trong Google Calendar của bạn, từ đó Google Calendar sẽ gửi SMS nhắc bạn.
Chú ý:
- Bạn có thể điền nhiều web để Monitor, nhưng Google Apps không cho phép thực hiện một lần chạy quá 60s, nên chúng tôi khuyền nghị bạn nên điền 2-3 website là tối đa. Google sẽ có cảnh báo với bạn nếu như chương trình chạy gặp vấn đề.
- Để nhận cảnh báo qua SMS, bạn cần vào Google Calendar và cài đặt số điện thoại
Chúc bạn có một công cụ thú vị để kiểm soát website hoạt động và kinh doanh tốt.
Đăng ký:
Bài đăng (Atom)